
A quality ceramic tint job should make every drive more comfortable, especially during bright Calgary summers and long commutes. But knowing how to maintain ceramic window tint matters just as much as choosing a premium film. The right care keeps the glass clear, helps prevent scratches and edge lifting, and protects the clean finish you paid for.
Ceramic film is built for performance. It can reduce heat, glare, and UV exposure without the signal issues associated with some older metallic films. It is still a thin film applied to the inside surface of your vehicle glass, though, so the first few days and your everyday cleaning habits make a real difference.
Let Ceramic Tint Cure Before You Clean It
The most common mistake happens right after installation: cleaning the inside of the windows too soon or rolling them down before the film has set.
Fresh tint needs time for the mounting solution to evaporate and for the adhesive to bond fully to the glass. In warm, dry conditions, that process may take a few days. During cool or damp Alberta weather, it can take longer. Your installer should give you a clear curing window based on the film, the vehicle, and the conditions on installation day.
Until then, keep the windows up and avoid wiping the inside glass. You may see a light haze, small water pockets, or faint streaks during curing. This is often normal and should gradually clear as moisture escapes. Do not press on those areas, poke at the edges, or try to push the moisture out yourself.
A large bubble that stays after the stated curing period, an edge that begins to lift, or a crease in the film is different. Take a photo and contact the installer promptly. Reputable tint work should be backed by a warranty, and early communication makes it easier to assess the issue properly.
How to Maintain Ceramic Window Tint With Safe Cleaning
Once the tint has cured, routine cleaning is straightforward. The goal is to remove fingerprints, road film, pet nose prints, and interior haze without exposing the film to harsh chemicals or abrasive tools.
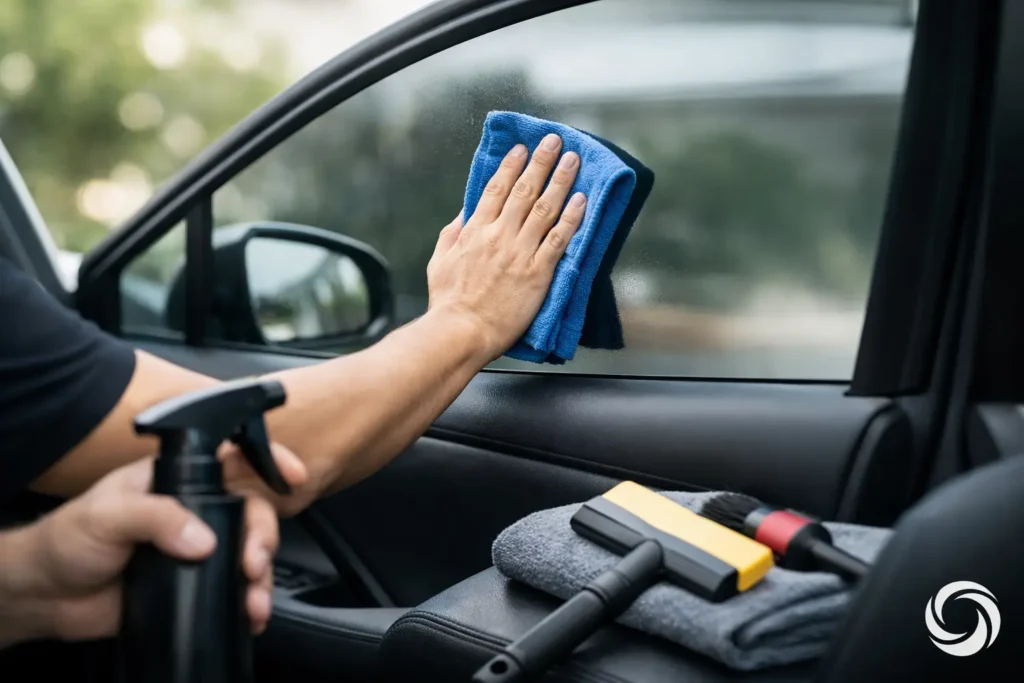
Use a clean, soft microfibre cloth and an ammonia-free automotive glass cleaner. Spray the cloth lightly rather than soaking the window, then wipe with gentle, even passes. A second dry microfibre cloth will remove any remaining moisture and help prevent streaking.
The cleaner matters. Ammonia-based products can dry out or discolour some window films over time. Household cleaners may also contain additives that leave residue behind. A cleaner labelled safe for tinted windows is the simple choice.
Be especially careful near the film edges. There is no need to scrub them. Wipe toward the edge with light pressure, and do not catch an edge with a fingernail, plastic tool, razor blade, or rough towel. Ceramic tint is durable, but scratching the film is not something that can be polished away like a mark on bare glass.
Avoid these common cleaning shortcuts:
- Paper towel, shop towel, newspaper, or any rough disposable wipe
- Ammonia-based glass cleaner or strong household degreasers
- Razor blades, scraper tools, steel wool, or abrasive pads
- Heavy spraying that allows cleaner to run into the bottom edge of the film
- Dirty cloths that may carry grit from other parts of the vehicle
If the inside of the rear window is difficult to reach, use a clean reach-and-clean tool with a soft microfibre cover. Take your time around rear defroster lines. The tint sits over the glass and those lines, so aggressive scrubbing can damage the film or affect the defroster grid.
Keep Dirt and Grit From Becoming Scratches
Most tint scratches are not caused by normal cleaning. They happen when grit gets trapped between the glass and something rubbing against it. This can be a sandy cloth, a pet carrier, a child seat shifting near the door glass, or an object pushed against a lowered window.
In winter, salt, sand, and slush are part of driving around Airdrie and Calgary. Keep the lower weatherstrips around your windows reasonably clean, particularly if you notice a gritty sound when operating the glass. Dirt in the window channels can drag against the tint when the window moves up or down.
You do not need to dismantle a door panel for routine care. During a wash, gently wipe accessible rubber seals and the top edge of the door frame with a damp microfibre cloth. If a window starts moving slowly, makes scraping noises, or leaves repeated vertical marks, have it inspected rather than forcing it. The problem may be a worn seal, debris in the channel, or a window regulator issue.
Winter Care Matters More Than Most Drivers Expect
Frozen windows are a risk for any vehicle glass, but they are particularly frustrating after tint installation. Do not force a power window down if it is frozen to the seal. The motor can strain, and ice or packed debris can scrape the film as the glass moves.
Warm the vehicle gradually and allow the defroster to do its job. If ice has built up along the outer seal, clear it carefully from the exterior side. Never use an ice scraper on the inside of a tinted window. For the rear window, avoid scraping across the interior defroster lines as well.
Condensation is another seasonal issue. If windows fog up, use the vehicle’s defrost setting and air conditioning as needed instead of repeatedly wiping the interior glass with a sleeve or dry paper towel. This protects the tint and gives you safer visibility at the same time.
Be Careful With Stickers, Suction Cups, and Accessories
Ceramic tint is designed to handle everyday use, but adhesive accessories can create avoidable problems. Avoid placing stickers, decals, tape, or suction-mounted devices directly on tinted side and rear windows when another location will work.
Removing adhesive from film can require rubbing or solvents, neither of which is ideal. If a sticker must come off, use the mildest tint-safe method possible, work slowly, and avoid pulling at the film. When in doubt, ask a tint professional before using an adhesive remover.
Also consider cargo and passengers. Long items, sports equipment, tools, and pet crates can strike tinted glass from the inside. The film is not a protective shield against impact. Secure gear properly, particularly in SUVs, hatchbacks, and work vehicles where rear side glass is close to the load area.
Know What Is Normal and What Needs Attention
A small amount of texture around dot matrix areas, curved glass, or factory markings can be normal. These sections of glass are more difficult for any tint film to bond to perfectly. The appearance may improve after curing, but some vehicles will always show minor variation in those areas.
What is not normal is new peeling, a growing bubble, a colour change, deep scratches, or a section that turns cloudy long after installation. Do not try to trim, glue, or heat the film yourself. A DIY repair can affect the warranty and may turn a small issue into a full replacement.
Take note of when you first saw the concern and whether it is getting worse. Clear photos taken in daylight are useful when speaking with your installer. If the film was professionally installed, the right next step is an inspection, not guesswork.
Protect the Value of Professional Tint Work
Ceramic tint is a practical upgrade, not a high-maintenance one. After the curing period, safe cleaner, clean microfibre cloths, and a little care in winter are usually all it takes. The trade-off is simple: harsh products and rushed cleaning may save a minute now, but they can shorten the life and appearance of the film.
Professional installation also gives you someone to call if questions come up. JDB Autoglass installs premium automotive tint with the same focus on dependable workmanship and convenient service that local drivers expect from their auto glass work.
Treat tinted glass as a finished interior surface, not bare window glass. That small shift in habit will help your ceramic film keep doing its job through hot afternoons, frosty mornings, and thousands of kilometres ahead.