
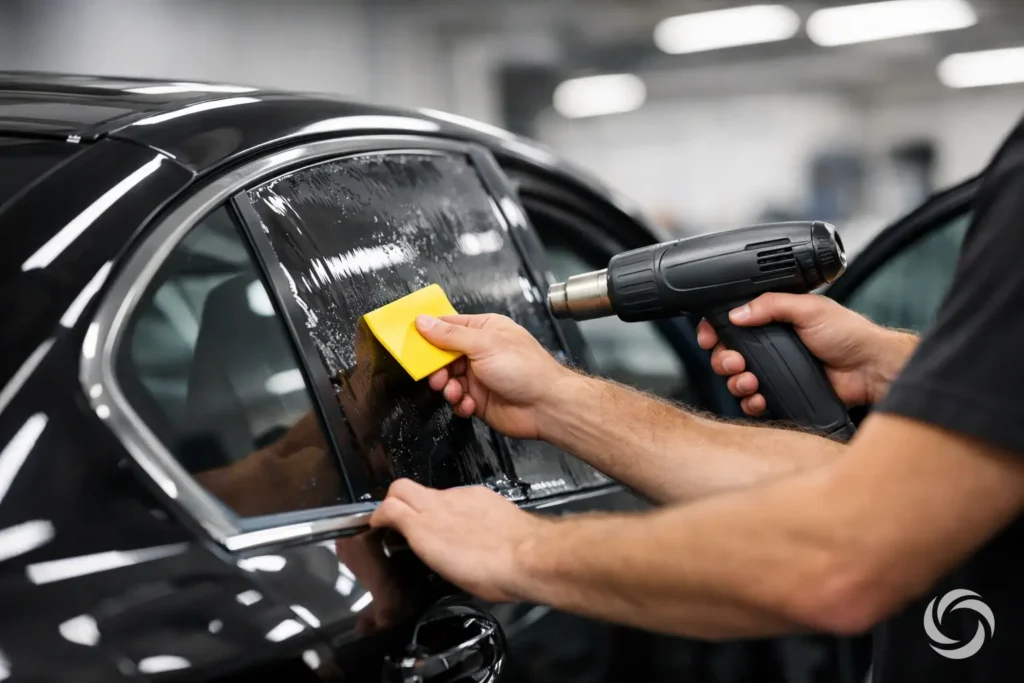
A clean window tint job can make a Calgary commute more comfortable, reduce glare, and help protect your interior from sun damage. But learning how to tint car windows is not as simple as sticking film to glass. The finish depends on careful prep, the right film, legal placement, and patience during installation and curing.
Check the rules and choose the right film first
Before buying tint, confirm the current Alberta requirements for your vehicle. Tint rules can vary by window location, and windshield and front-side window restrictions are typically tighter than rear-window rules. A film that looks good can still create safety concerns or lead to an unwanted inspection issue if it reduces visibility too much.
Also consider why you want tint. A darker shade adds privacy, but darkness is not the same as performance. Quality ceramic film can reject more heat and UV without needing the darkest appearance. Carbon film is another practical option for drivers who want a clean look, good heat reduction, and less fading than basic dyed film.
Cheap film often becomes expensive later. It can turn purple, bubble around defroster lines, peel at the edges, or make rear visibility harder than expected. Choose automotive-grade film with a warranty, and select a shade that suits your driving conditions. If you regularly drive before sunrise, after dark, or on rural roads, visibility matters as much as appearance.
Set up a clean, controlled work area
Dust, pet hair, wind, and direct sun are the enemies of a smooth tint installation. Work indoors whenever possible, ideally in a clean garage with enough room to open every door. Avoid a driveway on a windy day. Even a tiny piece of debris trapped under the film can show up as a noticeable bump once the glass dries.
You will need a spray bottle, clean water, a small amount of tint-safe slip solution, lint-free towels, a sharp snap-blade knife, a hard card or installation squeegee, a soft squeegee, and a heat gun. Keep extra blades nearby. A dull blade can drag and tear film instead of creating a crisp edge.
Clean hands matter too. Wash them before handling the adhesive side of the tint. Grease, hand lotion, and grit can leave marks that you cannot remove once the film is installed.
How to tint car windows step by step
Tinting is a process of cleaning, shaping, applying, and curing. Rushing any stage is usually what causes a job to fail.
Clean the glass beyond what looks clean
Spray the inside of the window generously and remove loose dirt with a squeegee. Pay close attention to the top edge, bottom seal, corners, and the felt channels along roll-down windows. These areas hold dust that can transfer to the film when you lower or raise the glass later.
Follow with a lint-free towel and inspect the glass from different angles. Do not use a towel that sheds fibres. On rear windows, clean gently around defroster lines. Scrubbing aggressively can damage the grid, and cutting against it during installation can cause more trouble.
For roll-down windows, lower the glass slightly so you can clean the upper edge. This small step helps prevent the thin line of contamination that often causes a tint edge to lift.
Measure, cut, and heat-shrink the film
Place the film on the outside of the glass with the liner facing outward, using your slip solution to hold it in place. This is where you shape the film before applying it on the inside. Leave a little extra material around the edges rather than trying to make a final cut immediately.
Side windows with a curve need heat-shrinking. Use a heat gun carefully to relax the film into the shape of the glass, moving constantly and using a hard card to control fingers. Fingers are the raised areas that appear when flat film does not match curved glass. Too much heat can crease, scorch, or distort the film, so use short passes instead of holding heat in one spot.
Once the film lies flat on the outside, trim it to a manageable rough shape. Keep the final edge slightly short of the glass edge. A tiny gap is normal and helps prevent the film from catching in the window seal.
Apply the film on the inside
Spray the inside glass again until it is thoroughly wet. Peel back the liner while spraying the adhesive side of the film with solution. The liquid gives you time to position the film and prevents it from grabbing the glass too soon.
Place the adhesive side against the wet interior glass, then slide it into position. Start by anchoring the top edge, checking the gap and alignment before moving down the window. Use a soft squeegee first, working from the centre outward to push solution and air toward the edges.
Follow with a harder card wrapped in a clean towel to remove remaining moisture, especially around the borders. Use firm, overlapping strokes. Do not force the tool into a tight edge where it could scratch the film or pull it away from the glass.
Rear windows deserve extra care. Their compound curves, defroster lines, and confined work space make them harder than side windows. Never cut directly on the rear glass near a defroster line. A damaged line can leave part of the rear window without heat and may require costly repair.
Let the film cure before judging it
Fresh tint will often look slightly hazy or show small water pockets. That does not automatically mean the job is defective. Moisture needs time to evaporate through the film, and cooler Alberta weather can slow the process.
Leave roll-down windows closed for the period recommended by the film manufacturer or installer. Avoid cleaning the new tint right away, and do not use ammonia-based glass cleaners once it has cured. A soft cloth and tint-safe cleaner are the safer choice.
Common mistakes that ruin a DIY tint job
Most failed installations come back to contamination, poor cutting, or trying to work too quickly. Dust under the film creates permanent specks. A cut that runs too close to the edge can peel when the window moves. Too much solution left behind can cause extended hazing, while too little solution makes the film lock in place before you can align it.
Film selection matters as well. Very dark tint can reduce your ability to see pedestrians, cyclists, ice patches, and vehicles at night. Reflective or low-quality material may also create glare or interfere with the clean factory look many drivers want.
Finally, do not ignore existing glass problems. A cracked side window, damaged weatherstrip, failing regulator, or loose rear defroster line should be addressed before tinting. Film cannot correct a mechanical or glass issue, and it may need to be removed later to complete the repair.
When professional tinting makes more sense
DIY tinting can be worthwhile for someone with a clean workspace, steady hands, and time to practise. It is less forgiving on vehicles with large curved rear windows, frameless doors, tight seals, or complex glass shapes. The first attempt can also cost more than expected once wasted film, tools, and rework are included.
Professional installation gives you precise cuts, controlled shrinking, proper edge finishing, and film selected for your vehicle and local driving needs. It also means you have warranty support if a material or installation issue appears after curing. For busy families, tradespeople, and commuters, that saves more than a few hours of trial and error.
JDB Autoglass provides mobile automotive tinting for drivers who would rather have experienced technicians complete the work at home or work. That is particularly useful when your schedule does not leave room for dropping off a vehicle and arranging a ride.
A well-tinted vehicle should feel more comfortable without making driving less safe or creating problems at the edges a few months later. Choose legal, quality film, give the installation the time it needs, and ask for professional help when the glass shape or your schedule makes a DIY job a poor trade-off.